
Table of contents
Introduction
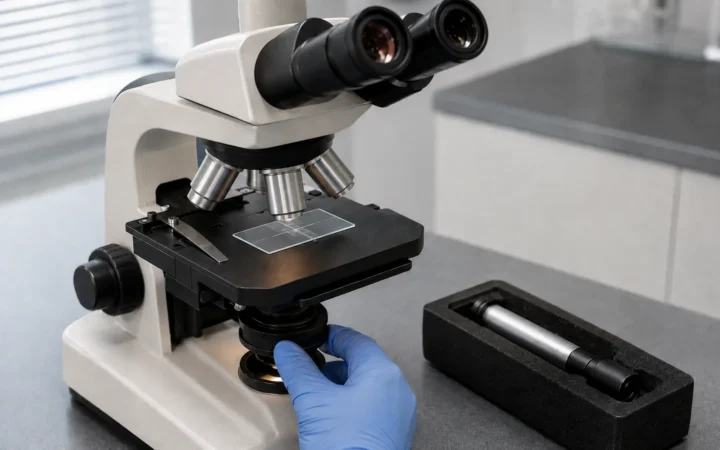
Microscopes are among the most important instruments in any clinical laboratory. They allow technologists and pathologists to visualise cells, bacteria, tissues and other microscopic structures that reveal a patient’s health status. In modern medical labs, Nikon microscopes are popular because they offer high optical performance, ergonomic designs and modular flexibility. However, even the most advanced microscope will deliver poor results if it is neglected or not serviced correctly. Dust, hardened immersion oil and misaligned mechanical components reduce contrast, create ghosting artefacts and accelerate wearmicro.magnet.fsu.eduzeiss.com. Research‑grade microscopes can last decades if they are properly maintained, but poor maintenance dramatically shortens their lifespan.
2026 maintenance note: The core maintenance advice remains useful. Keep optics clean with microscope-safe materials, remove immersion oil promptly, control dust and humidity, document preventive maintenance and use qualified service for alignment, electrical faults or calibration problems. Avoid opening sealed optical assemblies unless the manufacturer procedure specifically permits it.
This comprehensive guide explains how to care for Nikon microscopes used in clinical laboratories. It follows evidence‑based maintenance practices recommended by Nikon Instruments, university microscopy cores and other reputable sources. You will learn why routine maintenance matters, how to handle and store microscopes safely, how to clean optical components correctly, how to disinfect surfaces without damaging parts, and when to involve professional service technicians. The goal is to ensure accurate results while protecting the laboratory’s investment.
Throughout the article you’ll find links to relevant FrediTech resources for deeper reading. For example, the “Complete Guide to Digital Microscopy” explains how digital imaging systems replace eyepieces with cameras and enable remote collaborationfreditech.com, while “Choosing Your Lab Equipment” highlights why proper equipment selection and maintenance planning are crucial to patient carefreditech.com. These FrediTech articles complement the maintenance advice presented here.

Why microscope maintenance matters
Protecting image quality and scientific validity
Optical microscopes work by projecting light through lenses to magnify tiny objects. Any contamination along this optical path – dust on an eyepiece, dried immersion oil on an objective, fingerprints on a condenser lens – introduces scatter and absorption, reducing contrast and resolution. Nikon’s MicroscopyU primer emphasises that microscopes are expensive instruments that require periodic maintenance because neglect leads to dust, grime and misused objectives that degrade performance. Zeiss, another major manufacturer, warns that contaminated optics diminish the detectability of fine structures and cause reduced fluorescence signal strength. In clinical labs, where diagnostic accuracy is paramount, degraded optics can cause misinterpretation or missed pathology.
Extending instrument lifespan
Well‑maintained research microscopes can last for decades. Regular cleaning and proper storage prevent abrasive dust from scratching optical coatings, and timely removal of immersion oil prevents it from seeping into mechanical components. Zeiss’s maintenance guide notes that reducing contamination, using appropriate cleaning tools, and respecting the mechanical limits of a microscope extend equipment life and minimise downtime. Conversely, neglect leads to hardened oil residues, misaligned focus mechanisms and worn gears, requiring costly repairs or replacement.
Ensuring operator safety and infection control
Clinical labs handle infectious specimens. Surfaces such as focus knobs, stage handles and eyepieces can harbour pathogens. Nikon’s COVID‑19 disinfection guidelines advise wearing personal protective equipment (PPE) and using camera displays instead of eyepieces when possiblemicroscope.healthcare.nikon.com. Proper disinfection prevents cross‑contamination between samples and protects laboratory staff. However, using the wrong disinfectant can damage the microscope. Nikon warns that disinfectants like sodium hypochlorite, hydrogen peroxide and quaternary ammonium compounds are not compatible with Nikon components; instead, 70 % ethanol should be used to wipe surfaces and rubber gaskets.
Maintaining measurement accuracy
Many clinical tasks – such as counting cells, measuring parasite size or assessing tissue area – rely on calibrated scales. Calibration ensures that the distance between reticle divisions corresponds to real units. A stage micrometer with known spacing is used to calibrate each objective. The McCrone Group explains that calibration involves three steps: (1) focusing the eyepiece reticle without strain, (2) determining true magnification by multiplying eyepiece, objective and intermediate magnifications, and (3) using a stage micrometer to compute microns per division and create a sizing chartmccrone.com. Regular calibration should be part of your maintenance schedule so that measurements remain accurate.
Understanding Nikon microscope components
Nikon manufactures a range of microscopes for clinical and research laboratories. The ECLIPSE series features upright models (e.g., Ci and Ni for clinical and research use) and ergonomic models (Si and Ei), while the Ti2 series provides advanced inverted microscopes. There are also digital systems like the Digital Sight Ui that display images on a monitor rather than through eyepiecesfreditech.com. Although the specific cleaning procedure depends on the model, all microscopes share common components that require care:
- Eyepieces (oculars): These lenses are close to the operator’s face and can accumulate eyelashes, skin oils and dust. They must be cleaned regularly and disinfected to prevent infection.
- Objective lenses: These are the most critical optical components. Oil, water or glycerol immersion objectives require special cleaning to remove immersion media after use. Nikon’s objective cleaning brochure lists tools such as blowers, lens cleaning brushes, soft paper, absolute ethanol, petroleum benzine and distilled water for cleaningdownloads.microscope.healthcare.nikon.com.
- Condenser: This lens system beneath the stage focuses light onto the specimen and can collect dust and oil.
- Stage and slide holder: The stage surface and specimen clamp must be kept free of oil and debris to prevent contamination and wear.
- Focus knobs and mechanical drive: These mechanical parts should be kept clean and lightly lubricated; over‑tightening or forcing them can cause damagemicroscopeworld.com.
- Illumination system: LED or halogen bulbs produce heat; they should be switched off when not in use, and the housing should be kept clean.
Daily and weekly maintenance routines
Daily maintenance
Clinical laboratories use microscopes every day, so a quick daily routine prevents build‑up of dirt:
- Switch off illumination and cover the microscope. Zeiss recommends switching off the light source after use and covering the system with a dust cover to prevent dust accumulation. FSU’s microscopy primer emphasises using soft, flexible dust covers or lint‑free fabric covers to protect microscopes when not in use.
- Remove slides and immersion oil immediately. Never leave immersion oil on the objective. FSU warns that oil can penetrate gears and cause damage if left overnight; it should be removed after each specimen.
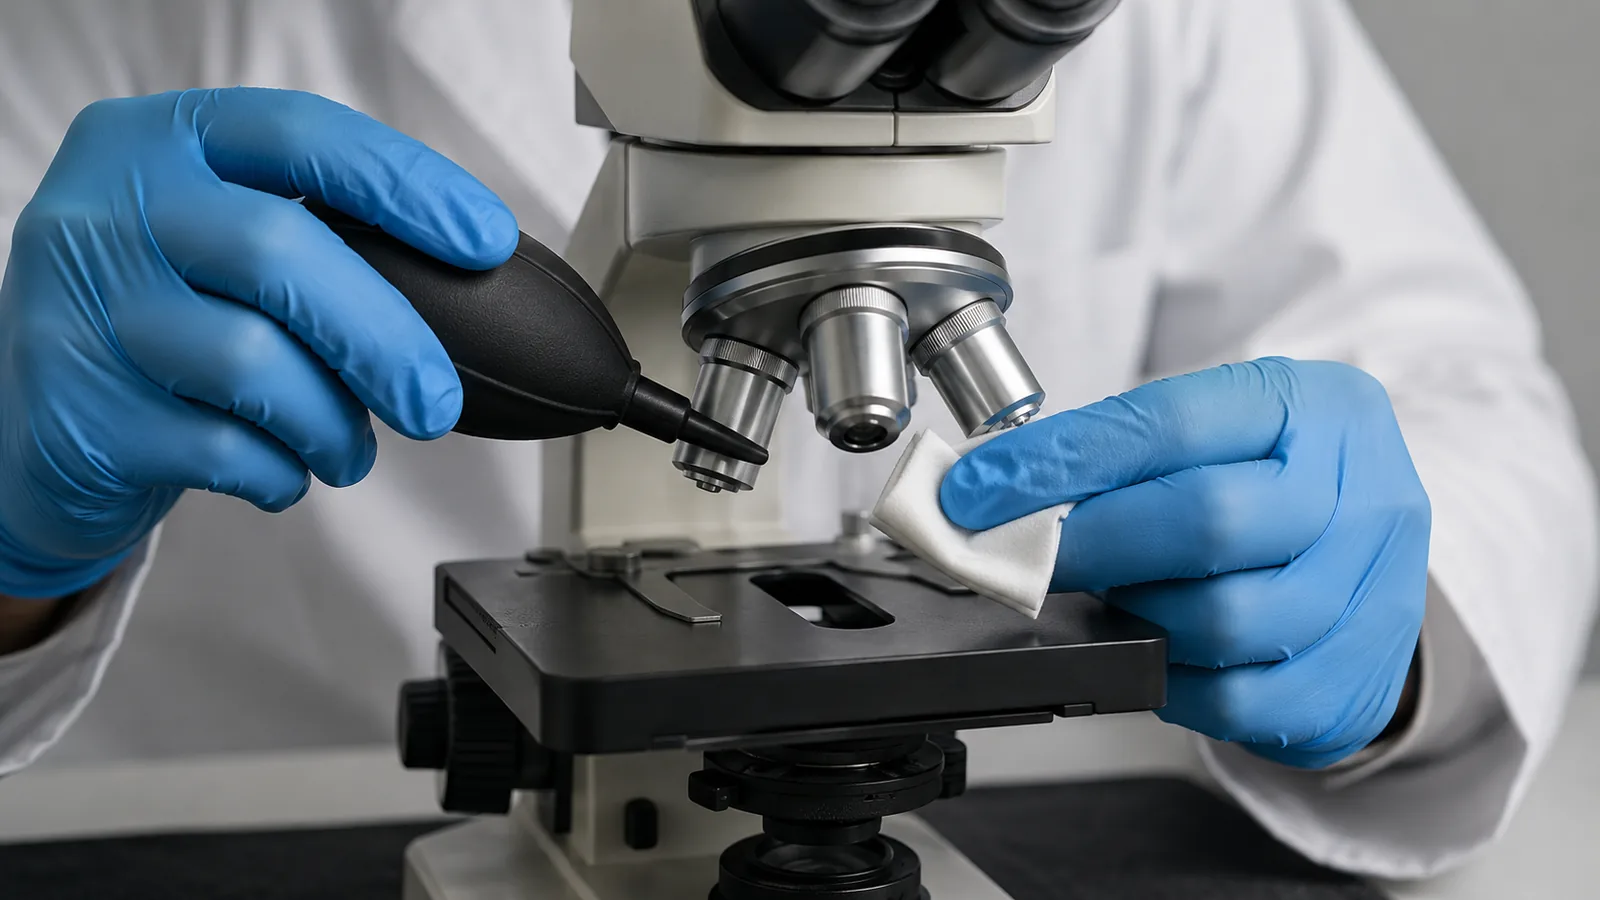
- Blow off dust. Use an air blower or rubber bulb to remove dust from the eyepiece, objectives and stage before wiping. Zeiss lists an air blower as the first step in daily cleaning.
- Clean control surfaces. Wipe focus knobs, stage handles and nosepieces with a lint‑free cloth moistened with 70 % ethanol. Pay special attention to commonly touched parts.
Weekly maintenance
At least once a week, schedule a deeper cleaning session:
- Inspect optics for dirt. Zeiss recommends rotating objectives, moving the specimen and adjusting the condenser while observing a clean field to locate stationary spots (dirt on optics). Identify which component needs cleaning before touching it.
- Clean eyepieces. Remove the eyepiece carefully, hold it upside‑down to avoid dust falling onto internal surfaces, and gently wipe the lens using lens tissue moistened with a suitable cleaning fluid (e.g., distilled water followed by 70 % ethanol). Rotate the eyepiece while viewing a blank field to check for remaining dust.
- Clean objectives. For dry objectives, use a blower to remove dust and then wipe gently with lens paper moistened with absolute ethanol. For oil immersion objectives, first wipe off oil completely using lens paper soaked in petroleum benzine (or ethanol if benzine is unavailable), then wipe again with ethanol to remove solvent residues. Nikon warns that petroleum benzine should only be used on metal parts; avoid resin or printed surfaces. The University of Edinburgh suggests that if biological material or medium is present, first wipe with distilled water before using 70 % ethanolbiology.ed.ac.uk.
- Clean condenser lenses. Lower the stage and use lens tissue moistened with 70 % ethanol to wipe the top lens of the condenserreach.cdc.gov. Move the condenser up and down to access different surfaces.
- Inspect and clean stage and slide holder. Remove any oil or debris from the stage surface; Zeiss notes that after oil immersion you should wipe the objective immediately to avoid residue and use suitable solvents. Wipe the specimen holder and stage with lint‑free cloth.
- Check illumination and filters. Ensure the lamp housing is free of dust and the filters (fluorescence cubes or polarizers) are clean. Avoid touching filter surfaces; if cleaning is necessary, consult the user manual or Nikon service technicians.
Weekly routines also provide a chance to check microscope calibration and mechanical adjustments (see later sections).
Handling and storage
Proper handling
Microscopes are precise instruments. Mishandling can misalign optical components or strip gears. MicroscopeWorld recommends carrying microscopes by supporting the base and the arm; never lift by the eyepiece tube or stage. Always focus gently; if the coarse adjustment moves too freely or feels stiff, adjust the tension collar rather than forcing the knob. Avoid rotating the nosepiece rapidly or slamming objectives into the slide. When using high power, ensure there is enough working distance to avoid crushing the slide.
Storage
Store microscopes in a dry, dust‑free environment. Use a dust cover or case even when the microscope is kept inside a cabinet. Do not store microscopes without eyepieces; doing so allows dust into the eye tubes. Allow illuminators to cool before covering to avoid heat build‑up. Avoid areas with corrosive fumes (e.g., near chemical storage); corrosive gases can damage coatings and electrical connections. FrediTech’s article on choosing lab equipment reminds laboratories that poor planning and inappropriate purchases waste resources and affect patient servicesfreditech.com. Good storage is part of protecting that investment.
Cleaning optical components
Eyepieces and ocular tubes
- Remove dust: Use a blower and a soft brush to gently remove dust from the eyepiece. Avoid using compressed air cans, as the propellant may leave residue.
- Wipe the lens: Moisten lens tissue or a lint‑free cloth with distilled water to remove biological residues, then follow with 70 % ethanol to disinfect. Wipe in a circular motion from the centre to the edge and use a fresh tissue for each wipe.
- Dry: Use a dry lens tissue to remove excess moisture and ensure no streaks remain.
- Disinfect surfaces: Use a cloth moistened with 70 % ethanol to wipe the eyepiece barrel and rubber eye guard; Nikon notes that 70 % ethanol is safe for eyepieces and rubber gaskets. Avoid stronger disinfectants that can degrade rubber or paint.
Objective lenses
Objectives must be cleaned with extreme care because their front elements are coated and precisely shaped. Nikon’s cleaning brochure lists the following tools: lens cleaning paper, blower, lens cleaning brush, absolute ethanol, petroleum benzine (for oil removal), distilled water and magnifying lens. Follow these steps:
- Identify the type of objective: Dry, oil immersion (usually 100×), water or glycerol immersion. The cleaning procedure depends on the medium used.
- Remove dust: Use an air blower or lens brush to remove loose dust.
- Remove immersion oil (if used): Immediately after use, wipe the oil off the objective with lens paper soaked in petroleum benzine. If benzine is not available, absolute ethanol can be used but may require multiple wipes.
- Final cleaning: Wipe the lens gently with lens paper soaked in absolute ethanol. Nikon cautions that petroleum benzine and absolute ethanol are highly flammable; wear gloves and keep them away from heat sources.
- Remove water immersion residues: For water immersion objectives, wait briefly for water to evaporate; if dust remains, use distilled water followed by absolute ethanol.
- Inspect: Use a magnifying lens to check that the front element is clean and free of scratches. If dirt remains, repeat the cleaning or contact a service technician.
- Avoid strong solvents near plastic: Do not use benzine or ethanol on resin, coated or printed parts of the objective, as they can cause discoloration.
The University of Edinburgh’s objective cleaning protocol adds that you should unscrew the objective from the nosepiece for full cleaning and inspect it under a stereo microscope. If necessary, use chloroform as a solvent for stubborn dirt but apply only with a Q‑tip and very light pressure. After cleaning, reattach the objective and test the image with a clean slide.
Condenser and filters
The condenser lens focuses light on the specimen. Dust or oil on its top surface reduces illumination uniformity. To clean:
- Lower the condenser using the focus knob or condenser adjustment.
- Use lens tissue moistened with 70 % ethanol to wipe the top lens.
- Check other surfaces by raising and lowering the condenser while examining a blank field. Clean as needed.
Many Nikon microscopes include fluorescence filter cubes or polarizing filters. These have delicate optical coatings. Do not touch filter surfaces with fingers or solvents. If cleaning is required, consult Nikon service or remove the cube and gently dust with a blower. Internal optical components and filter cubes should only be cleaned by Nikon‑authorized technicians.
Stage and specimen holder
Wipe the stage surface, slide clips and specimen holder with a lint‑free cloth moistened with 70 % ethanol. Remove any oil residue before placing a new slide to avoid contamination. Make sure the stage’s movement remains smooth. If it feels stiff or loose, adjust the tension screws according to the user manual or ask a technician.
Disinfection without damage
During outbreaks of infectious diseases like COVID‑19, microscopes must be disinfected frequently. However, disinfectants can damage optical coatings, adhesives and plastics. Nikon’s disinfection guidelines recommend the following:
- Use 70 % ethanol: Among WHO‑recommended disinfectants, Nikon confirms that 70 % ethanol is safe for eyepieces, objectives, body, stage and accessories. Moisten lens cleaning tissue or low‑lint lab tissue with 70 % ethanol and wipe the surfaces.
- Avoid incompatible disinfectants: Do not use sodium hypochlorite (bleach), hydrogen peroxide, quaternary ammonium compounds, phenolics, benzalkonium chloride or chlorhexidine on Nikon microscope parts because they can degrade materials.
- Pay attention to high‑touch areas: Focus knobs, nosepieces and stage handles are touched frequently and should be disinfected thoroughly.
- Follow user manuals and local authority guidelines: Nikon advises that if disinfection instructions conflict with user manuals, follow the manual and handle microscopes as potentially infectious. Always wear PPE and consult local biosafety guidance.
These precautions ensure that disinfection does not compromise the microscope’s optical and mechanical integrity.
Caring for mechanical components
Adjusting focus and tension
The coarse and fine focus knobs control the vertical movement of the stage or nosepiece. Over time, friction surfaces may dry out or become overly loose. MicroscopeWorld advises lubricating sliding surfaces annually with a thin layer of lithium‑based grease and adjusting the tension if the coarse focus moves too freely. Avoid lubricating rack and pinion teeth directly, as this attracts dust. Consult the user manual to locate the tension collar or adjusting screw.
Nosepiece and objective turret
Rotating the nosepiece should be smooth but not loose. If it is stiff, consult the manual for the correct lubricant and procedure. Do not force the nosepiece or rotate it while pressing downward on objectives; this can damage threads and misalign optics. Check that click‑stop detents align objectives precisely over the specimen; if they are misaligned, have a technician adjust them.
Stage mechanics
The mechanical stage and specimen holder allow precise movement during scanning. Keep the X–Y control knobs clean; wipe them with ethanol and occasionally lubricate the sliding surfaces as recommended. If there is slack or uneven movement, adjust tension screws or seek service.
Illumination and electrical components
Modern Nikon microscopes use LED light sources that last tens of thousands of hours. Nevertheless, switch off the illumination after use and allow it to cool before covering the microscope. Inspect power cords and connectors regularly for damage. If the illumination flickers, check the power supply or contact Nikon service.
Calibration and quality control
Importance of calibration
As noted earlier, microscope calibration ensures that the scale on your eyepiece or digital screen corresponds to real measurements. Without calibration, measurements of cell size, parasite counts or tissue thickness will be inaccurate. McCrone’s webinar emphasises focusing the reticle correctly, calculating true magnification and using a stage micrometer to calibrate each objective. Calibration should be performed annually or whenever an objective is serviced or replaced.
Calibrating an optical microscope
Here is a simplified calibration procedure (see our detailed FrediTech article “How to Calibrate a Nikon Microscope for Accurate Results” for step‑by‑step instructions)freditech.com:
- Set up the microscope: Switch to the lowest magnification objective and focus on a stage micrometer. Align the zero lines of the micrometer and the eyepiece reticle.
- Calculate magnification factors: Determine the total magnification by multiplying the objective magnification, eyepiece magnification (usually 10×), and any intermediate magnification (e.g., 1.5× selector). Nikon microscopes often include intermediate optics in the light path, so factor them in.
- Count divisions: Align the zero lines and locate a point where reticle and stage divisions coincide. Count the number of reticle divisions that correspond to a known length on the stage micrometer (e.g., 100 μm)microscopecentral.com.
- Compute calibration factor: Divide the known distance (in micrometres) by the number of reticle divisions to determine the size of one reticle division at that magnification. Repeat for each objective and record the values.
- Create a reference table: Keep a calibration chart near the microscope for quick reference when measuring samples.
Calibrating digital systems
Nikon’s NIS‑Elements software allows you to calibrate digital images by specifying the camera, objective and pixel size. According to Nikon’s manual, you can perform a manual calibration by imaging a calibration slide (e.g., Nikon MBM11100 with 10 μm divisions). The software asks you to click two points on the image corresponding to a known distance (e.g., 100 μm) and then calculates pixel sizegvsu.edu. Calibration should be saved for each optical configuration and selected when changing objectives. If images are captured without applying the correct calibration, measurements default to pixels.
Professional servicing and service intervals
Even with diligent in‑house maintenance, some tasks require professional attention. Nikon states that internal optical components and filter cubes should only be cleaned by Nikon‑authorized service technicians. MicroscopeWorld recommends that compound microscopes be serviced after approximately 200 hours of use or about every three years for schools; more frequent servicing may be needed in laboratories that use microscopes daily. Professional service typically includes:
- Disassembling and cleaning internal optics.
- Checking and adjusting mechanical alignments (e.g., stage travel, click stops, centering of objectives).
- Re‑lubricating precision components.
- Verifying illumination intensity and electrical safety.
- Recalibrating measurement scales.
Laboratories may sign service agreements with Nikon or third‑party providers. Scheduled maintenance reduces downtime, ensures compliance with accreditation standards and can extend warranty coverage. FrediTech’s article on equipment selection notes that the World Health Organization warns against inappropriate purchases and emphasises that planning for maintenance and servicing is vital to avoid waste and protect patient services. Including service contracts in procurement budgets is part of responsible equipment management.
Real‑world examples and best practices
Digital pathology and remote collaboration
Proper maintenance not only keeps microscopes functioning but also supports emerging clinical workflows such as digital pathology. The digital conversion of slides enables remote consultation and AI‑assisted analysis. Grundium’s article on digital pathology notes that high‑resolution digital slide scanners improve diagnostic accuracy and allow pathologists to review cases remotelygrundium.com. This reduces turnaround time and facilitates second opinions, particularly in underserved regions. For these benefits to be realised, microscopes used for scanning and referencing must be clean and properly calibrated. Dust or misalignment on the objective would degrade the digital image, undermining the advantages of remote pathology.
Adoption of digital microscopes
Nikon’s Digital Sight Ui is a digital microscope that eliminates eyepieces and displays live images on an integrated monitor. It can be controlled remotely, enabling consultation and teaching without physical proximity. Digital systems still rely on high‑quality optics, but they remove some contamination risks associated with eyepieces. They also make it easier to enforce cleaning schedules because multiple users can see when lenses are dirty or oil remains on objectives. Regular maintenance of digital microscopes involves cleaning objectives and condenser lenses, dusting monitors and keyboards, and updating firmware.
Ergonomics and user well‑being
An often‑overlooked aspect of maintenance is user comfort. Long hours at a microscope can cause neck and back strain. Nikon’s ECLIPSE series includes ergonomic features like adjustable binocular tubes and low‑height stages. For example, the Ci series allows the stage to be lowered and the eye level raised to promote a natural posturemicroscope.healthcare.nikon.com, and the Si series includes one‑hand operation and a built‑in light intensity management (LIM) system that remembers brightness settingsmicroscope.healthcare.nikon.com. While cleaning, ensure that adjustable parts move smoothly and that lubricants are not causing unwanted stiffness. A well‑maintained microscope is easier to use, which reduces fatigue and errors in clinical work.
Sustainability and cost savings
Maintaining microscopes reduces the need to replace parts and extends the life of equipment. Zeiss points out that correct cleaning and storage extend the microscope’s lifespan and minimise instrument downtime. This conserves resources and supports sustainability goals. Buying new microscopes prematurely not only wastes money but also contributes to e‑waste. Proper maintenance therefore aligns with both fiscal responsibility and environmental stewardship.
Frequently Asked Questions (FAQ)
How often should I clean my Nikon microscope?
Perform daily cleaning after each use: remove immersion oil, blow off dust, wipe control surfaces and cover the instrument. Conduct weekly deeper cleaning of eyepieces, objectives, condenser, stage and illumination components. Schedule professional servicing every 200 hours of use or every 2–3 years.
What cleaning solutions are safe for Nikon microscopes?
Use 70 % ethanol for disinfecting and cleaning eyepieces, body and stage surfaces. For objective lenses, Nikon recommends absolute ethanol for removing fingerprints and petroleum benzine to dissolve immersion oil. Avoid bleach, hydrogen peroxide, quaternary ammonium compounds and other harsh disinfectants which can damage materials.
How do I remove immersion oil from a 100× objective?
Immediately after use, wipe the objective with lens paper soaked in petroleum benzine to dissolve the oil. Follow with lens paper soaked in absolute ethanol to remove any residues. Use a fresh piece of paper for each wipe to avoid redepositing oil. Clean again before the oil hardens; hardened oil may require distilled water or solvent and gentle rubbing with a Q‑tip.
Can I use household cleaners or alcohol wipes on my microscope?
No. Household cleaners often contain ammonia, bleach or other chemicals that degrade optical coatings and plastics. Use only laboratory‑grade 70 % ethanol for surfaces and lens cleaning paper moistened with absolute ethanol or petroleum benzine for objectives.
How do I know when to have my microscope professionally serviced?
Contact a service technician if you notice any of the following: persistent dirt or fogging that cannot be removed by routine cleaning; misalignment of objectives or stage travel; stiff or slipping focus knobs; flickering illumination; or calibration that cannot be verified. Schedule regular servicing after 200 hours of use or every three years.
Do I need to recalibrate after cleaning my microscope?
It depends. Calibration factors usually remain stable unless you change objectives, camera adapters or optical components. However, if you unscrew objectives for cleaning or adjust intermediate optics, recheck the calibration with a stage micrometer. Digital microscopes should be recalibrated whenever the software or hardware configuration changes.
What should I do if I accidentally drop oil inside the microscope body?
Do not attempt to open the microscope or apply solvents inside. Oil inside the mechanical or optical housing can damage coatings and lubricants. Immediately wipe any accessible surfaces and contact Nikon or a qualified service provider to clean the internal components.
How can I keep my microscope safe during an infectious disease outbreak?
Follow biosafety guidance from local authorities and Nikon’s disinfection recommendations. Wear PPE, use camera viewing instead of eyepieces when possible, and disinfect high‑touch surfaces with 70 % ethanol after each user. Avoid using bleach or other incompatible disinfectants.
Conclusion
Routine maintenance is essential for ensuring accurate results, protecting staff and extending the life of Nikon microscopes in clinical laboratories. Microscopes are delicate optical and mechanical systems; dust, hardened oil and misadjusted components degrade performance and can lead to incorrect diagnoses. Evidence‑based guidelines from Nikon, university cores and manufacturers highlight the importance of daily cleaning, weekly deep maintenance, proper handling and storage, careful cleaning of objectives and eyepieces, and safe disinfection practices. Calibration and professional servicing further ensure measurement accuracy and reliability.
By incorporating these maintenance routines into your standard operating procedures, your laboratory will protect its investment in Nikon microscopes, uphold the accuracy of patient results, and contribute to sustainable laboratory practices. For more insights on digital microscopy, advanced imaging techniques and laboratory equipment selection, explore FrediTech’s
- Complete Guide to Digital Microscopy,
- Advanced Imaging Techniques
- Choosing Your Lab Equipment
- How to Calibrate a Nikon Microscope for Accurate Results
- Nikon vs. Olympus Microscopes: Which Is Better for Your Lab?
- Fluorescence Microscopy in Medical Labs: Uses and Benefits
- Microscope Maintenance Tips for Medical Lab Professionals
- Applications of Microscopy in Medical Laboratories
- Types of Microscopes Used in Medical Laboratories: A Complete Guide
References
- Nikon Instruments – Microscope Maintenance
- ScienceDirect – Microscope Care and Calibration
- Clinical Laboratory Guidelines – Equipment Maintenance Best Practices
For more detailed information on Nikon microscope care and troubleshooting, consult the manufacturer’s official manual or reach out to an authorized service center.
n