
Better smartphone photography comes less from having the newest camera and more from understanding light, composition, focus, exposure and the limitations of small sensors. Modern phones automate a lot, but knowing when to move, tap, wait, use a different lens or avoid digital zoom makes a bigger difference than most camera-mode menus.
Quick Verdict
- Good light and composition improve photos more reliably than extreme megapixel counts.
- Use the native lens that best fits the scene and avoid excessive digital zoom when image quality matters.
- Clean the lens, stabilize the phone and learn exposure/focus controls before buying extra camera accessories.
Table of contents
Introduction: The Dawn of Mobile Photography
Smartphone Photography: A Revolution in Visual Storytelling
The rise of smartphones has completely changed photography, turning it from a niche hobby into an accessible art form for billions. What used to require specialized cameras and equipment is now a powerful capability in nearly every pocket. This accessibility has democratized visual storytelling, making it easier for anyone to capture and share high-quality moments.

The Power of AI and Computational Photography
Mobile photography is no longer a compromise; it’s a serious and evolving segment of the photography world. Smartphone camera technology is constantly innovating, with modern devices increasingly rivaling or even surpassing traditional DSLRs and mirrorless cameras in specific conditions, especially in dynamic range and low-light performance.
This power comes from the sophisticated integration of Artificial Intelligence (AI) and Machine Learning (ML) algorithms. These intelligent systems enable real-time scene recognition, automatic optimization of camera settings, and advanced image enhancements like intelligent skin tone rendering and vibrant color boosting. The camera essentially “thinks” for the user, making complex adjustments instantly and transforming raw data into superior final images. This software layer allows smaller sensors and lenses to overcome physical limitations, enabling even mid-range phones to capture incredible, high-quality images that sometimes outperform professional cameras. Future smartphone camera upgrades are likely to focus more on the sophistication of algorithms, AI chips, and software pipelines rather than just physical sensor size or lens elements.
Beyond Technical Prowess: Practical Advantages
Beyond their technical capabilities, smartphones offer unique advantages due to their discreet nature and compact size, particularly for genres like street photography. Unlike larger, more conspicuous cameras, a smartphone allows photographers to remain incognito, capturing authentic moments without disturbing the environment.
This blend of advanced technology and practical usability makes mobile photography an incredibly potent tool. The widespread availability of powerful mobile cameras has lowered the barrier to entry for visual content creation, empowering individuals and small businesses to tell their stories and participate in the digital economy without expensive traditional camera gear. This fosters a more visually-driven communication landscape, shifting the focus from technical camera intricacies to the photographer’s composition and storytelling.
The “AI-ification” of Photography
The evolution of smartphone cameras also highlights a significant trend: the “AI-ification” of photography. Features like Apple’s Photonic Engine, Google’s Magic Editor and Real Tone, and Samsung’s Nightography showcase increasingly sophisticated AI automation in image capture and processing. These systems often operate automatically in the background, handling complex technical aspects. While professional modes offer manual control, the dominant trend is towards intelligent automation, providing higher baseline quality for casual users. For advanced users, AI acts as a powerful tool, augmenting their skills and allowing them to push creative boundaries.
Ultimately, the “best camera phone” is subjective and dependent on the use case, as manufacturers specialize their computational photography strengths. The ideal choice depends on a user’s specific needs, budget, and primary photography interests.
Chapter 1: Mastering Your Smartphone Camera’s Core Capabilities
This chapter delves into understanding Computational Photography, the digital wizardry that allows smartphones to produce exceptional images despite their small lenses and sensors. It involves sophisticated software algorithms that process, enhance, or construct images from multiple data points, moving beyond optical and mechanical limitations. This innovation enables even mid-range phones to capture high-quality images, sometimes outperforming professional cameras.
Key Computational Photography Features:
- HDR Imaging (High Dynamic Range): A common and impactful application, HDR captures multiple exposures (underexposed for highlights, overexposed for shadows, and standard) of the same scene. These are then intelligently merged into a single, cohesive image, retaining significantly more detail in both bright and dark areas. This results in a balanced and visually pleasing photograph, particularly effective for high-contrast scenes like landscapes with bright skies or backlit subjects.
- Portrait Mode and Bokeh Effects: These features allow smartphones to simulate the artistic background blur, or “bokeh,” traditionally achieved with DSLR cameras and fast, wide-aperture lenses. Smartphones use computational photography by leveraging depth data, often from multiple lenses or specialized sensors, to accurately identify the subject and digitally blur the surroundings, creating professional-looking portraits.
- Night Mode: Addressing the historical weakness of smartphone cameras in low-light conditions, Night Mode captures a rapid series of images at different exposure levels. These frames are then meticulously merged using advanced algorithms to reduce digital noise, improve detail, and dramatically brighten the scene. For example, Samsung’s Night Mode combines up to 30 individual images through AI multi-frame processing to optimize color and detail, resulting in significantly clearer and more detailed images in dimly lit environments.
- AI and Machine Learning: These are the foundational pillars of modern computational photography. AI and Machine Learning enable smartphones to intelligently recognize scenes, objects, and faces, allowing the camera to adjust settings in real-time for optimal capture. For instance, AI can enhance skin tones in portraits, boost color vibrancy in landscapes, or even upscale image quality by intelligently filling in missing details. This continuous learning transforms raw optical data into superior final images, making the smartphone camera increasingly intuitive and powerful.
Unlocking Pro Mode: Manual Controls Explained (ISO, Shutter Speed, White Balance, Manual Focus, Exposure)
While automatic modes offer convenience for quick snaps, “Pro Mode” (often called Manual Mode or Pro Camera Mode) on most modern smartphones empowers photographers with granular control over key camera settings, moving beyond the phone’s predefined algorithms. This level of control is essential for creative expression and achieving specific photographic effects.
- ISO: This setting dictates the camera’s sensitivity to light. A lower ISO number (e.g., 32-100) means less sensitivity, ideal for brightly lit environments or stationary subjects, minimizing digital noise. Conversely, a higher ISO (e.g., 800-3200) increases sensitivity, crucial for capturing faint light in low-light conditions or fast-moving objects, though it can introduce more noise or graininess into images.
- Shutter Speed: This controls the duration for which the camera’s sensor is exposed to light. A slow shutter speed (e.g., several seconds for moving clouds, 10-30 seconds for night sky) allows more light to enter, resulting in brighter photos and creating artistic motion blur effects like silky smooth water or dynamic light trails from moving vehicles. A fast shutter speed (e.g., 1/1000s or faster) allows less light in and is ideal for freezing fast-moving subjects, capturing crisp action shots. It is important to note that if shutter speed is set manually, ISO often cannot be set to auto.
- Aperture: While many smartphones have fixed apertures, some advanced models or third-party apps allow for aperture control. Aperture refers to the size of the lens opening, directly influencing the depth of field (the portion of the image that appears sharp) and the amount of light reaching the sensor. A wider aperture (represented by a lower f-stop number like f/1.8) lets in more light, performs better in low light, and creates a shallow depth of field, ideal for isolating subjects with pleasing background blur (bokeh). A narrower aperture (higher f-stop) brings more of the scene into sharp focus.
- White Balance: This setting balances the color temperature of images to ensure true-to-life colors, compensating for different light sources (e.g., warm incandescent, cool fluorescent, natural daylight). Users can select appropriate presets or manually set the color temperature (e.g., around 3000K for a cooler tone in astrophotography to reduce light pollution effects).
- Manual Focus: In challenging lighting conditions or when precise focus is critical (e.g., macro photography, astrophotography), manual focus is invaluable. Instead of relying on autofocus, users can manually adjust the focus point. For astrophotography, setting focus to “infinity” ensures distant stars are sharp. For close-ups, tapping on the screen to focus on the specific subject is key.
- Exposure Compensation: This allows users to fine-tune the overall brightness of a photo. They can increase the exposure value (EV) for low-light situations to brighten the image or decrease it to prevent overexposure in very bright scenes.
The table below provides a concise overview of these Pro Mode settings and their practical applications:
Leading Smartphone Camera Innovations: Apple, Google, Samsung
The intense competition among smartphone manufacturers like Apple, Google, and Samsung has fueled remarkable innovation in computational photography. Each brand has developed proprietary features to push the boundaries of mobile imaging.
Apple iPhone:
- Photonic Engine: Apple’s advanced computational photography pipeline, enhances image quality especially in mid- to low-light conditions. It integrates Deep Fusion earlier in the imaging process, resulting in exceptional detail, preserved textures, better color accuracy, and more information retention. iPhone 15 and Pro models can capture higher-resolution 24MP photos.
- Deep Fusion: A foundational technology that intelligently combines multiple exposures pixel-by-pixel to reduce noise and optimize detail, particularly in challenging lighting scenarios.
- Smart HDR: Apple’s High Dynamic Range implementation, which merges multiple exposures to achieve a wider dynamic range, ensuring balanced details across bright and dark areas.
- Magic Editor: A groundbreaking AI-powered editing tool that allows users to reframe, crop, expand scenes, or add new elements based on text prompts, pushing the boundaries of in-phone photo manipulation.
- Real Tone: A significant Google AI initiative focused on accurately and authentically representing diverse skin tones by improving face detection in low light, refining white balance, ensuring natural skin brightness, and reducing washed-out effects.
- Night Sight: Google’s dedicated feature for capturing brilliant, detailed photos in extremely low-light environments, leveraging computational techniques to brighten and clarify scenes without flash. Additional features include Super Res Zoom for distant subjects, Macro Focus for intricate details, and “Best Take” for combining optimal facial expressions in group photos.
- Nightography: Samsung’s branding for its advanced low-light photography capabilities. This feature uses AI multi-frame processing to combine up to 30 images, optimizing color and detail for sharp, vivid photos even in very dark conditions.
- Space Zoom: Featured in flagship phones (e.g., Galaxy S24 Ultra), this capability uses multiple telephoto lenses (e.g., 3x and 5x optical zoom) to capture distant subjects with clarity.
- Pro Mode: Offers comprehensive manual control over ISO, shutter speed, exposure, white balance, and manual focus, providing flexibility for various shooting scenarios.
- Expert RAW: An app for professional users (Galaxy S20 and later) that saves both JPEG and uncompressed RAW (Linear DNG 16-bit) files, offering greater detail for post-editing. It also includes advanced features like Astrophotography mode (with a Sky Guide) and Multiple Exposure modes.
Common Smartphone Photography Mistakes to Avoid
Even with advanced smartphone cameras, certain common errors can significantly diminish photo quality. Avoiding these issues can greatly improve your mobile photography.
Key Mistakes and How to Fix Them:
- Tilting the Phone: This causes perspective distortion, making subjects appear unnatural. Always hold your phone straight and on the same level as the subject. Using in-camera gridlines can help.
- Using Digital Zoom: This significantly degrades image quality, leading to pixelation and noise. Instead, physically move closer to the subject. If your phone has multiple lenses (e.g., wide-angle, telephoto), switch between them for optical zoom to preserve quality.
- Dirty Lens: A smudged or dusty camera lens causes hazy, blurry, or foggy photos. Regularly clean your smartphone camera lens with a soft, clean microfiber cloth.
- Relying Solely on Auto Mode: While convenient, Auto Mode can lead to inconsistent results in challenging lighting. Understand and utilize your phone’s “Pro Mode” for greater creative control and consistent, high-quality outcomes.
- Poor Lighting Choices: Harsh midday sunlight creates unflattering shadows, and direct smartphone flash results in harsh, unnatural lighting. Seek out natural, soft light, such as during golden hour, in shaded areas, or near a window indoors. Position your subject to face the light source for even illumination.
- Shaky Hands: This is particularly problematic in low-light conditions or with long exposures, causing blur or streaks. Always strive for stability by using a tripod, bracing your arms, or leaning your phone against a stable object.
- Low Storage Space: This can cause the camera app to slow down, freeze, or crash. Regularly delete unnecessary files or apps and use cloud storage to back up photos and videos, ensuring at least 20% free space.
- Software Glitches/Outdated Apps: These can lead to erratic camera behavior. Regularly restart your phone, update the operating system, and ensure all camera-related apps are up-to-date. Check app permissions and consider uninstalling problematic apps if conflicts arise.
Chapter 2: Essential Composition Techniques for Mobile Photographers
Foundational Principles: Rule of Thirds, Leading Lines, Symmetry, Negative Space
Composition is the backbone of any great photograph, dictating how elements within the frame are arranged to create balance, focus, and visual interest. Even with advanced smartphone features, a strong understanding of compositional principles is paramount.
The Rule of Thirds is arguably the most fundamental and widely taught compositional guideline in photography. It involves mentally dividing the screen into a 3×3 grid using two equally spaced horizontal lines and two equally spaced vertical lines. The principle suggests placing the main subject or other key elements of interest at the intersections of these lines or along the lines themselves. This off-center placement creates a more balanced, dynamic, and visually engaging image than simply centering the subject. Many smartphone camera apps offer a built-in grid overlay to assist with this technique.
Leading Lines are a powerful technique that uses natural or constructed lines within a scene to guide the viewer’s eye through the photograph, typically towards the main subject or a point of interest. These lines can be roads, rivers, fences, architectural features, or even patterns. They create a sense of depth, direction, and visual flow, drawing the viewer deeper into the image.
Symmetry and Balance offer an alternative to the Rule of Thirds. While the Rule of Thirds suggests asymmetry, symmetrical composition creates striking and harmonious images by mirroring elements on either side of a central axis. This technique is particularly effective for subjects like reflections, architectural facades, or patterns where perfect balance enhances the visual impact. Beyond perfect symmetry, balancing elements means arranging them to achieve a sense of visual equilibrium, even if not perfectly mirrored.
Negative Space, often overlooked, refers to the empty or uncluttered area surrounding the main subject. It is just as important as the subject itself because it provides context, creates visual breathing room, and helps to draw the viewer’s attention directly to the focal point. A well-utilized negative space can simplify a busy scene, evoke emotions like isolation, or allow for the strategic placement of text in a graphic design context.
Advanced Composition for Visual Impact: Golden Ratio, Juxtaposition, Visual Tension
Beyond foundational principles, advanced compositional techniques allow photographers to create images with deeper meaning, stronger impact, and unique artistic flair.
The Golden Ratio/Fibonacci Spiral is considered a more sophisticated compositional tool than the Rule of Thirds. This mathematical principle (approximately 1:1.618), found throughout nature and art, involves composing an image by following a natural, spiraling pattern that creates inherently balanced and aesthetically pleasing proportions. This technique guides the viewer’s eye through a natural flow, often leading to a focal point within the spiral. It is particularly effective in nature, portrait, landscape, and abstract photography.
Juxtaposition involves placing two or more contrasting elements together within the frame to create visual interest and tell a compelling story through their differences. The contrast can be in terms of old versus new, nature versus urban, light versus shadow, large versus small, or even conflicting emotions. Juxtaposition adds layers of meaning and intrigue to a photograph.
Visual Tension refers to deliberate compositional choices that create a sense of unease, curiosity, or dynamic energy, intentionally challenging conventional framing norms. Techniques include:
- Element Cropped Close to the Edge: Cutting off part of a subject or object near the frame’s edge can make viewers wonder what lies beyond, creating anticipation or a sense of immediacy.
- Subject Facing Out of the Frame: A person or object looking intently outside the frame generates curiosity about what they are observing or moving towards, creating imbalance and narrative tension.
- Imbalance: Purposefully off-balancing elements in the frame (through color, weight, or placement) creates instability, challenging the viewer’s innate desire for harmony and engaging them more deeply.
- Broken Patterns: Disrupting a repetitive pattern with an anomaly (e.g., a missing brick in a wall) plays on the viewer’s expectation of order, generating tension and symbolizing nonconformity.
Other advanced techniques include:
- C & S Curves: Incorporating curved elements (roads, rivers, coastlines) to create visual flow, emphasizing depth and smoothness.
- Diagonal Lines: Adding dynamic energy, movement, and drama to static scenes.
- Tunnel Vision/Framing: Using natural or architectural elements (archways, window frames, tree branches) to create a “frame within a frame,” adding depth and directing attention to the subject.
- Triangle Composition: Arranging elements to form triangular shapes, which can create stability or dynamic tension depending on their orientation.
- Half and Half: Splitting the frame into equal horizontal or vertical parts for striking, balanced minimalist scenes or reflections.
- Sandwich Composition: Framing the main subject between similar elements on either side to create natural focus and balance.
- Quarter Frame: Dividing the frame into quarters and placing the subject at an intersection, offering more flexibility than the Rule of Thirds.
A crucial observation in mobile photography is that limitations can be freeing. As one photographer noted, “All you can do is focus on the fundamentals… You start to think so much more about your composition”. This highlights that true “stunning mobile moments” are born not just from advanced phone features, but from the photographer’s skilled eye and understanding of composition. Compositional rules, regardless of the camera used, are timeless principles. This means the artist, not just the tool, creates the art, underscoring the importance of human skill in photography.
Furthermore, while foundational compositional rules are essential, understanding when and how to deviate from them is equally crucial for artistic expression. Deliberately breaking established compositional norms, such as those employed in visual tension techniques, can create unique visual impact, evoke specific emotions, generate curiosity, and lead to deeper viewer engagement. This approach transforms a technically correct photo into a truly artistic and memorable one, encouraging creative experimentation beyond mere technical proficiency.
Chapter 3: Specialized Smartphone Photography Genres & Techniques
Smartphones have opened doors to various photography genres once exclusive to specialized equipment, enabling users to explore diverse creative avenues.
Capturing Motion: Long Exposure Photography
Long exposure photography transforms movement into abstract or ethereal art by keeping the camera’s shutter open for an extended period (seconds to minutes). This blurs moving elements like water or crowds into smooth textures or light trails, while stationary elements remain sharp, creating cinematic effects.
Essential Gear is crucial for long exposure:
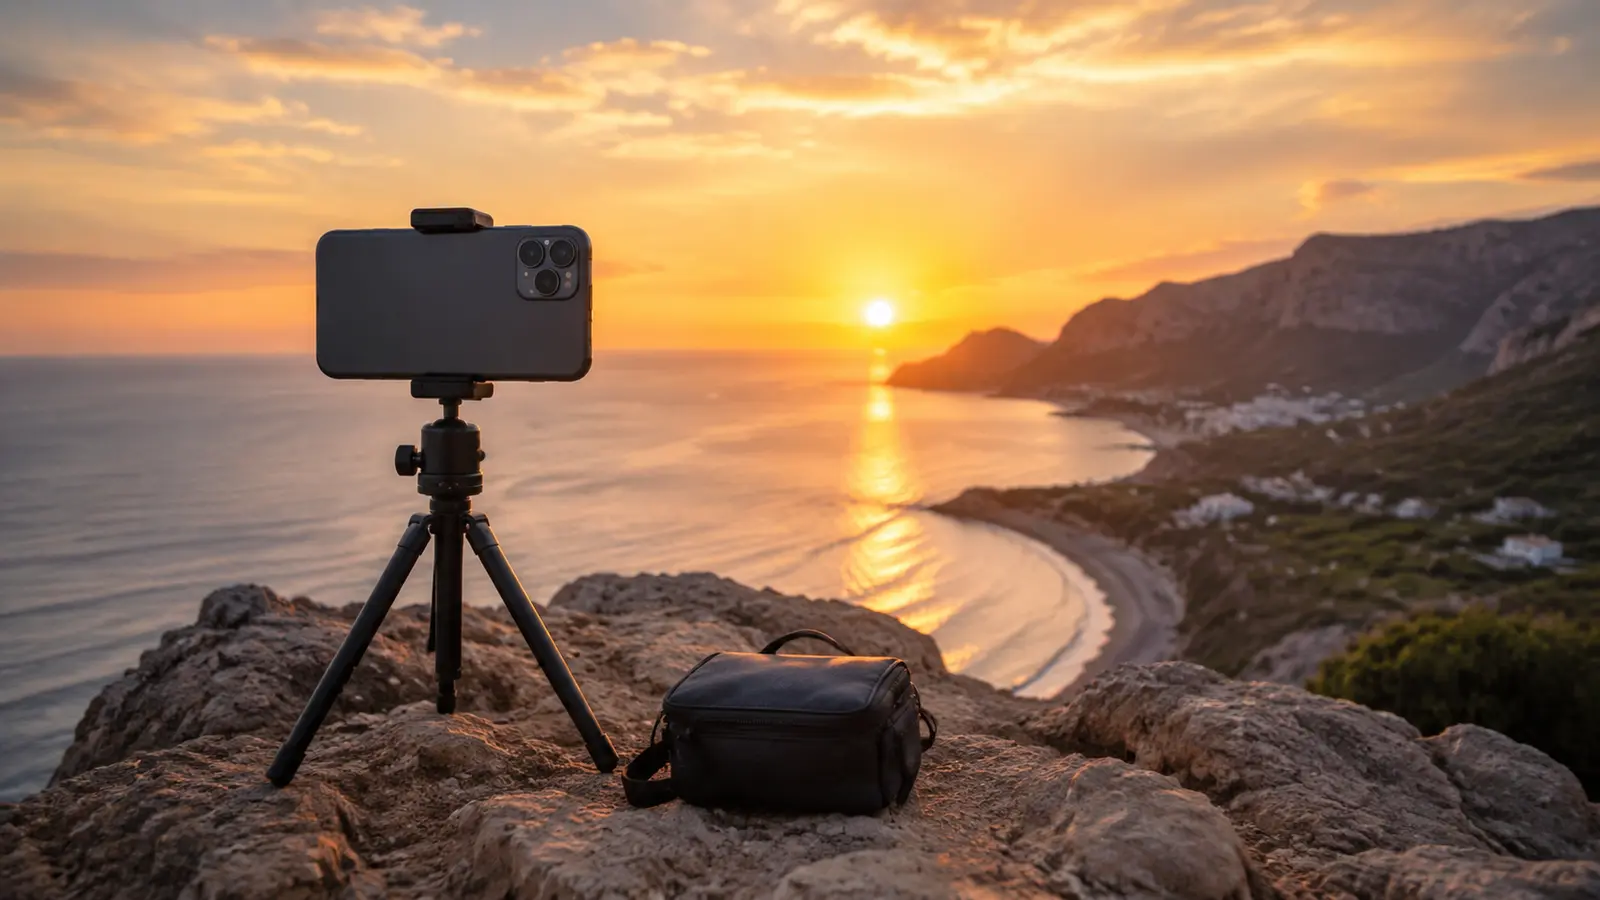
- A reliable tripod or smartphone mount prevents vibrations.
- A remote shutter (Bluetooth trigger) or the phone’s self-timer eliminates camera shake.
- ND (Neutral Density) filters are indispensable for daytime long exposures, reducing light to allow longer shutter speeds without overexposure.
Dedicated Apps are often necessary for manual control over shutter speed:
- iOS: Camera+ 2, Slow Shutter Cam, ProCamera, Easy Long Exposure Camera, ReeHeld.
- Android: ProShot, Manual Camera DSLR, Long Exposure: Motion ProCam.
Key Techniques involve adjusting shutter speed based on the desired effect (e.g., seconds for smooth clouds, 10-30 seconds for night sky) and setting ISO to the lowest possible value (e.g., ISO 50 or 100) to minimize digital noise. Compositionally, create a strong contrast between static and moving elements.
Stacking (Image Averaging) is an advanced technique that simulates very long exposures, significantly reduces digital noise and hot pixels, and minimizes vignetting by blending multiple shorter exposures. This offers flexibility in post-processing. You capture multiple short exposures (e.g., 10-20 photos) and process them with dedicated stacking apps (e.g., DeepSky Camera, Starry Sky Stacker) or desktop software like DeepSkyStacker or Photoshop.
Shooting the Stars: Smartphone Astrophotography
Smartphone astrophotography leverages powerful computational processing to overcome hardware limitations (smaller sensors, fixed lenses) and capture impressive night sky images.
Essential Settings (Pro Mode) are crucial:
- High ISO setting (e.g., 800 to 3200) captures faint objects, but balance with increased digital noise.
- Shutter speed of 10-30 seconds is critical for dim light; longer exposures without a star tracker cause star trails.
- Use manual focus and set to “infinity” for sharp stars.
- A cooler white balance (around 3000K) neutralizes light pollution.
- Avoid flash and HDR mode.
Several Accessories are indispensable:
- A tripod is non-negotiable for stability.
- A remote shutter or self-timer prevents camera shake.
- Lens attachments (wide-angle for Milky Way, telephoto for Moon).
- Astrophotography clip-on filters (e.g., UHC) reduce light pollution.
- Smartphone camera adapters securely attach a phone to a telescope.
Planning is crucial:
- Select dark sky locations away from city lights using apps like Light Pollution Map.
- Avoid shooting during a full or nearly full Moon.
- For Milky Way shots, use apps like PhotoPills and Stellarium to determine visibility.
Image stacking significantly improves quality by reducing digital noise and clarifying faint details. This can be done with dedicated apps (DeepSky Camera, Starry Sky Stacker) or desktop software.
Troubleshooting common issues includes using a tripod for blurry photos, image stacking and low ISO for noise (graininess), and finding darker locations or using UHC filters for light pollution.
Capturing the City: Street Photography
Street photography is an accessible genre that thrives on capturing raw, unscripted moments in urban environments, ideal for smartphone photographers.
Discretion is paramount. Smartphones are compact and less intrusive. Maintain a low profile by dressing low-key, avoiding direct eye contact, using silent shutter modes, and holding the camera at chest height. Be ready for spontaneous moments, and consider shooting from the hip.
Settings prioritize speed and adaptability. Use Photo Mode with HDR for varied lighting and Night Mode after sunset. A fast shutter speed freezes motion. Experiment with manual ISO (e.g., ISO 400 in sunlight, up to ISO 6400 at night).
Composition is key. Use rules like the Rule of Thirds, leading lines, and natural framing. Observe how light and shadow create contrast, and look for symmetry or juxtapositions. Fill the frame, crop, and experiment with different angles (e.g., low, diagonal).
Culinary Creations: Food Photography
Food photography aims to make dishes look appetizing, often for social media. Key elements are lighting, angles, and props.
Lighting is crucial. Natural light is almost always preferred over artificial light. Position food near a window for soft, flattering light, ensuring it’s not too bright. The best lighting comes from the side or behind the food to emphasize texture and depth. If natural light isn’t available, use soft lamps or LED full spectrum lights, and a white reflector to bounce light into shadows.
Angles significantly impact perception. Avoid distortion from wide-angle lenses by using an overhead (90-degree) shot or a 0-45 degree angle. The 90-degree angle is great for table spreads and flat dishes, while a straight-on shot (closer to 0 degrees) is recommended for vertically stacked dishes. A 45-degree angle creates depth but can introduce distortion.
Props add visual appeal but require balance to avoid overcrowding. Simple, minimalistic compositions with a couple of food items and one or two props (napkins, silverware) are effective. Choose backgrounds that contrast well, like plain backdrops or textured surfaces. Attention to plating is crucial. Include negative space to prevent clutter and focus the viewer on the main subject.
Chapter 4: Enhancing and Managing Your Mobile Photo Workflow
Optimizing the post-capture process is as crucial as the shooting itself for achieving stunning mobile moments. This involves leveraging powerful editing applications and establishing efficient organizational habits.
Top Mobile Photo Editing Apps: Advanced Features & Tutorials (Lightroom Mobile, Snapseed, VSCO)
Mobile photo editing applications have evolved significantly, offering advanced features that rival desktop software.
Adobe Lightroom Mobile is a comprehensive tool for editing, organizing, and sharing photos. It allows users to view device photos, import multiple images, and organize them into albums and folders. Advanced editing capabilities include adjusting tonal scale (exposure, contrast, shadows), applying selective edits, and removing unwanted objects using AI-powered tools. Users can apply various presets and profiles or create custom ones, and even edit videos within the app. Lightroom Mobile also supports capturing photos in Auto, Pro, or HDR modes, and in DNG raw formats on supported devices, providing greater latitude for post-processing.
Snapseed, a free and powerful photo editor, offers a wide array of tools for enhancing color, exposure, and detail. Its strength lies in its selective editing tools, which provide granular control. The Brush tool allows precise adjustments to brightness and color in specific areas, useful for dodging and burning or selectively increasing saturation. The
Selective tool enables individual editing of different colors within a photo, allowing adjustments to brightness, contrast, saturation, or structure after selecting a specific color area.
Masking is a powerful feature that allows selective application of any Snapseed edit, enabling effects like creating a black and white image with a single color pop. Other features include the
Vignette tool for subtle darkening or brightening of image edges, and a variety of customizable filters to change the mood or add artistic touches.
VSCO is renowned for its iconic presets, which apply distinct film-like looks and moods to photos with a single tap. Beyond presets, VSCO offers a suite of basic and advanced adjustment tools. Basic adjustments include exposure, contrast, and saturation. More advanced features include
HSL (Hue, Saturation, Luminance) for precise control over individual color ranges, allowing users to shift hues, adjust saturation, or change the brightness of specific colors without affecting the entire image. The
Split Tone tool enables adding independent color tones to shadows and highlights, creating complex color relationships and artistic shifts in mood. VSCO also includes a “Remove” tool for cleaning up shots and the ability to customize presets or create “Recipes” (custom preset combinations) for a signature look.
Optimizing Your Workflow: Organization, Storage, and Backup
An efficient workflow is crucial for managing a growing library of mobile photos, preventing clutter, and ensuring valuable memories are preserved.
Organization begins with planning. Using apps like Notion, Google Keep, or Apple Notes can help plan photoshoots, noting desired lighting conditions (e.g., golden hour, overcast midday) and locations. After shooting, a streamlined approach involves marking preferred images as “favorites” directly on the phone or iPad, which allows for easy access to photos intended for editing or sharing. Regularly deleting unwanted pictures is also essential to declutter the camera roll and free up storage space. Creating new folders for different trips or categories within the phone’s native photo app or cloud services like Google Photos ensures images are easily accessible and organized.
Storage and Backup are critical for safeguarding photos. Smartphones can quickly fill up with high-resolution images and videos. Utilizing cloud storage services (e.g., iCloud, Google Photos) automatically backs up photos, freeing up local device space and providing access across multiple devices. For more control, batch-importing photos into editing software like Lightroom or VSCO allows for further organization and processing. Shooting in RAW format, if supported by the smartphone, provides higher quality and more latitude for editing, though these files are larger and require more storage.
Continuous monitoring of website performance using tools like Google Analytics or Google Search Console is also crucial for photographers who share their work online, helping them understand how their content is performing and identify new opportunities.
Conclusion: The Future of Mobile Photography
The journey through the capabilities of modern smartphone photography reveals a landscape transformed by technological innovation and creative potential. What began as a simple point-and-shoot function has evolved into a sophisticated imaging system, capable of capturing stunning mobile moments that once required professional-grade equipment. The pervasive nature of smartphones has democratized visual storytelling, empowering billions to engage in content creation and share their perspectives with unprecedented ease. This shift underscores a profound change in how visual narratives are constructed and disseminated.
At the heart of this evolution lies computational photography, a powerful paradigm where software algorithms and artificial intelligence act as a performance multiplier, enabling small sensors and lenses to overcome their inherent physical limitations. Features like HDR, Portrait Mode, and Night Mode are not mere enhancements; they are fundamental reimaginations of image capture, allowing even mid-range devices to produce results that, in specific conditions, can rival or surpass traditional cameras. This ongoing “AI-ification” of photography suggests that future advancements will increasingly be driven by algorithmic sophistication rather than solely by hardware specifications. For the casual user, this translates to a higher baseline quality of photos without the need for technical mastery, shifting their focus to the art of composition and narrative. For the seasoned photographer, AI becomes a powerful augment to their skills, expanding creative possibilities.
The diverse array of specialized photography genres now accessible via smartphones—from the ethereal blurs of long exposure to the intricate details of astrophotography, the candid spontaneity of street photography, and the artistic presentation of culinary creations—demonstrates the versatility of these devices. Each genre benefits from specific techniques and often specialized applications and accessories, highlighting that while the camera is in the pocket, the artistry remains in the eye and skill of the photographer. The ability to break traditional compositional rules for artistic impact, as discussed, further emphasizes that the human element of vision and intent is paramount, regardless of the tool.
Looking ahead, the boundary between hardware and software in photography will likely continue to blur, with AI-powered features becoming even more integrated and intuitive. The “best camera phone” will remain a subjective choice, tailored to individual needs and photographic interests, as manufacturers continue to specialize their computational strengths. Ultimately, the future of mobile photography lies in its continued ability to empower, innovate, and inspire, making the art of capturing moments more accessible and creatively boundless for everyone.
Frequently Asked Questions (FAQs)
What settings should I use for low-light smartphone photography?
For low-light conditions, try using night mode if available, stabilize your phone with a tripod, and adjust the ISO and shutter speed in manual mode. Experiment with exposure to balance brightness and avoid blur.
How can I improve my smartphone’s portrait mode photos?
Focus on proper lighting and experiment with manual focus if your device allows it. Utilize natural light, and try different angles to create depth. Enhancing the image in post-processing can also make a significant difference.
Do I need to invest in external lenses for better quality?
External lenses can greatly enhance your smartphone photography by providing new perspectives and higher quality close-ups. They are especially useful for macro and wide-angle photography. However, many modern smartphones already come with excellent built-in lenses.
Which editing app is best for mobile photography?
The best editing app depends on your needs. Adobe Lightroom Mobile is great for advanced editing, Snapseed offers a robust set of free tools, and VSCO provides creative presets. Explore each app to determine which best fits your style.
Can I shoot RAW photos on my smartphone?
Yes, many smartphones now offer RAW shooting capabilities in their pro mode. Shooting in RAW allows for greater flexibility in post-processing, as it preserves more detail than standard JPEG images.
Internal and External Resources
For further insights into mobile photography and advanced editing, check out these resources:
- Internal Resources:
- Creative Mobile Photography Tips – Explore more creative ideas for capturing unique photos.
- Pro Mobile Photography Tips for Stunning Smartphone Photos – Learn more about using manual settings and professional techniques on your smartphone.
- Mobile Photo Editing Techniques – Detailed reviews and recommendations on must-have photography accessories.
- External Resources:
- Digital Photography Review – Stay updated with in-depth reviews and industry insights.
- Photography Life – Expert advice, tips, and tutorials on photography techniques.
The best camera phone 2025: we’ve tested all the top smartphones for photos and video
Long Exposure Phone Photography: Capture Stunning Nighttime Images with Your Smartphone – Lightroom Photoshop Tutorials
I Shot This Stunning Long Exposure With Just My Phone—Here’s the Step-by-Step
Smartphone Astrophotography, Part 1: Using Just a Phone – PhotographingSpace.com
36 types of photography and how to find your niche – Gelato
SEO for Photographers: 15 Expert Tips to Help You Rank in 2024
SEO For Photographers: An Ultimate Guide (2025) – Kyle Goldie
Don’t make this mistake when taking smartphone photos – Linda Holt Creative
How to use the camera’s pro mode on Samsung Galaxy phones
Project Indigo – a computational photography camera app – Adobe Research
Best Camera Phone of 2025 – CNET
Ten Tips for Taking IG-Worthy Food Photos with your Phone – Piquant Post
Smartphone Photography Guide to Taking Your Best Photos – 11th Street Design
Understanding Computational Photography in Smartphones
A Comprehensive Guide to Amazing Smartphone Photography – fabienb
Nightography | The Best Samsung Night Mode Camera
2025 Lightroom Mobile Tutorial | Everything You Need For Great Edits – YouTube
The Food Photographer’s Guide To Better Composition – We Eat Together
Smartphone Astronomy and Astrophotography Accessories – OPT Telescopes
Thank you for reading our Ultimate Smartphone Photography Guide. If you found this guide helpful, please share it with your friends, leave a comment with your thoughts or questions, and check out our other expert photography articles for more inspiration and tips.
Happy shooting and may your mobile photography journey be filled with creative breakthroughs!